Welcome back to your favorite desserts and baking blog:)
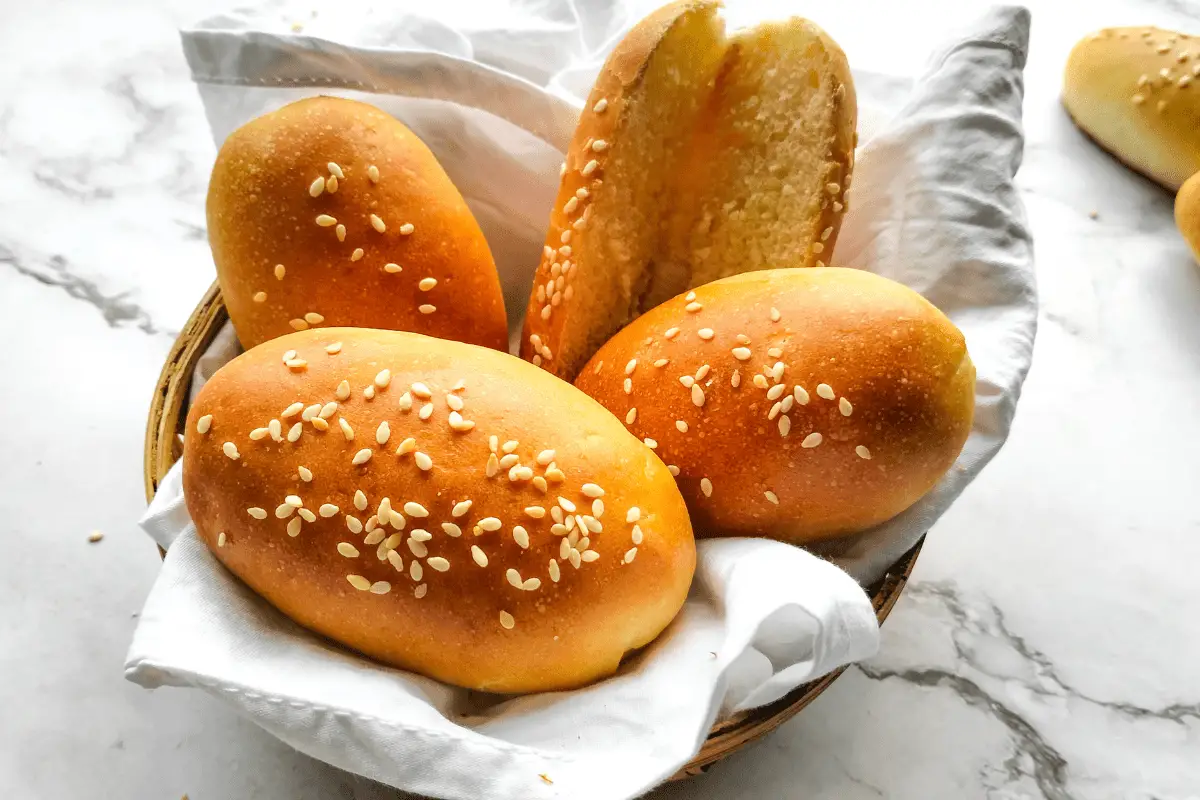
Mini Hotdog Buns that are super fluffy and soft will spruce up your everyday meals. Throw in some sauce, a leafy vegetable, onions, pickles, and a protein, and you have got yourself a winner. It’s great to make hot dogs, but you can also go ahead and make a sandwich.
Table of contents:
- Equipment required
- Ingredients required
- Procedure
- Step-by-step picture
- Video Tutorial
- FAQ
- Recommended recipes
- Recipe Card
There are links on this site that can be defined as affiliate links. As an Amazon Associate, I earn from qualifying purchases.
What equipment do I need to make mini hotdog buns?
Pastry brush
Pastry brush for milk wash. You want to avoid using a wooden brush oven here. Why? Because your bread is all proofed and happy, and you don’t want to use a rough pastry brush and punch a hole in there! This brush will be gentle on the dough and get the job done.
Dough scraper
Dough scraper for portioning dough. This is essential while making bread. The one I use is from my college days, so you can see it is a one-time investment. I am linking this one over here because it is stainless steel, so the chances of it getting bent are very low. Use it to clean your hands and table while making the dough, cut out portions of dough, lift the dough, and even shape high-hydration dough.
A set of teaspoons and tablespoons
This stainless steel measuring spoon set is perfect. I use the one that my pastry college provided to me. I did use the plastic ones, but let me tell you, yes, they may look boring, but stainless steel is best for long-term and safe use.
Big Bowl
I use this one because, when I shoot videos, it reflects the light, and you also get to see all the ingredients. It can also be used in the microwave.
Baking Tray
My sister uses this baking tray, and she loves it. I use a round baking tray, and I could not find the link to that exact baking tray, probably because I bought it years back. You can check this one out. Out of all the baking trays, I felt this one was the best out there.
Weighing Scale
Not everything good is costly, and this weighing scale is perfect for weighing for all your recipes. I have been using this one for 6 years, and then it broke because I dropped it by mistake. You would think, I bought one after that but no. I decided to use a tape and kept using it for 6 more months until it finally gave up, and I had to buy another one.
What ingredients do I need to make mini hotdog buns?
All-purpose Flour
Let me tell you this, you can get beautiful bread using all-purpose flour, too. That being said, you can use bread flour, too, to get even better results. You can use this one.
Yeast
I am using active dry yeast in this recipe. If you have instant yeast, use half the amount for this recipe. Instant yeast does not require any activation. This ingredient is important in giving bread its classic flavor and rise.
Salt
Imagine if your bread kept rising and finally burst. Fun? Not much when you want to have bread. Salt is what controls the fermentation of yeast, and it also makes the gluten stronger.
Sugar
You can use grain sugar or castor sugar. The sugar is food for the yeast, which helps add flavor and color to the bread.
Milk
Milk is used to make the bread a little richer in taste and contributes to the color, too.
Water
Water helps dissolve all the ingredients and helps in making a dough by creating the gluten.
How to make mini hotdog buns?
Pre-prep
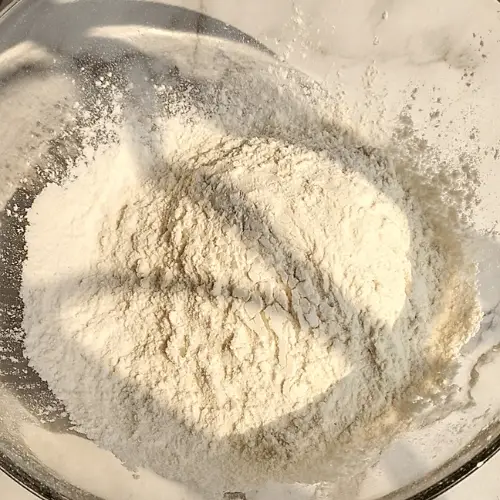
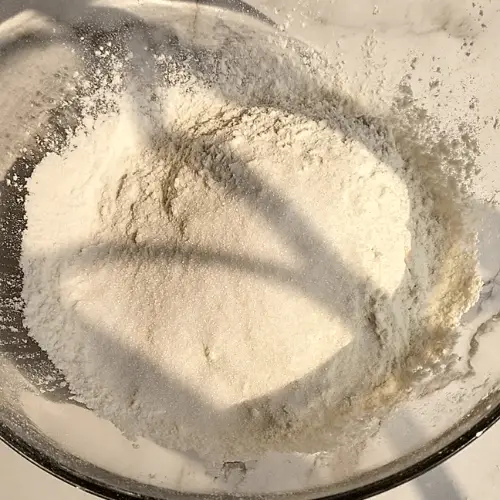
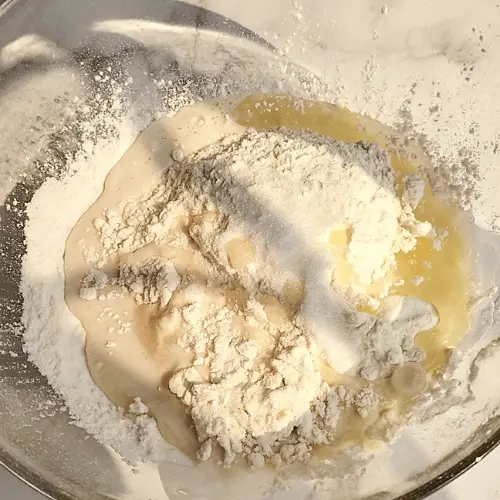
Begin by sieving the flour in a bowl. To measure the egg, crack it in a bowl and whisk it using a whisk or fork so that the yolk and white mix together. Now, measure how much you require. It’s okay if you have excess, you can use it to brush some egg wash on the bread. Add the salt and keep aside.
Activating the yeast
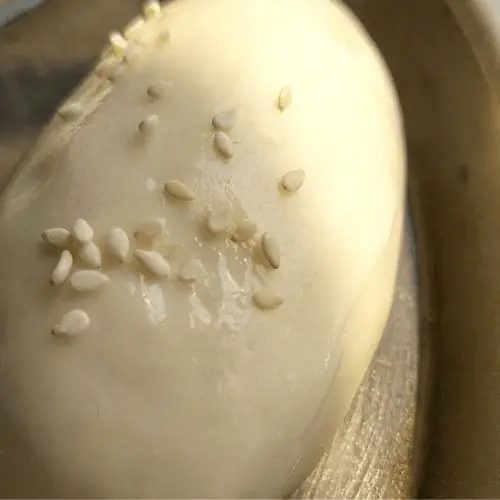
If you are using instant yeast, skip this step. If you are using active dry yeast like me, then in another cup or bowl, mix the yeast, milk, and sugar. Stir to mix well and dissolve the sugar. Cover and let the yeast activate for 5 to 10 minutes.
Here, the yeast is feeding on the sugar to create carbon dioxide and alcohol. You can see the carbon dioxide in the form of bubbles in the mix, and you can smell the alcohol.
Making the dough
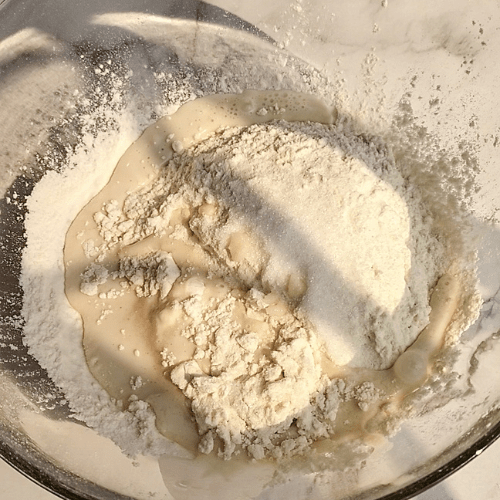
Once the yeast mix is bubbly and frothy, add it to the flour mix. If it is not bubbly, please check the expiry date.
Add the oil to it, too.
Start kneading the dough. This recipe is a small batch of dough that can be easily kneaded by hand or knead it in a machine using the dough hook. If using the machine, do not knead for more than 6-8 minutes. By hand, it will take a little longer, like 15 minutes. My hands start paining, so I let the dough rest for 15 minutes in between and continue kneading. The rest allows the gluten to relax and stretch, resulting in a dough that is easier to handle.
Knead it to form a small, smooth, round ball or “boule.”
Bulk fermentation
Brush some oil in a bowl and place the dough inside. This is to prevent the dough from sticking to the bowl.
Cover the dough with either a damp cloth or a cling film and let it proof in a warm area.
If it is too cold where you are staying, preheat your oven for about 5 minutes at 200 degrees Celsius/392 degrees Fahrenheit, then place the dough bowl inside. Place a cup of water to create some humidity inside, too.
Let it rest for 30 minutes.
Shaping
Punch to degas the dough, I know, satisfying! We degas to release the excess amount of gas that has been created in the dough.
If you have a weighing scale [read you should], measure out 3o grams of portions of the dough. In case you don’t have a weighing scale, simply eyeball.
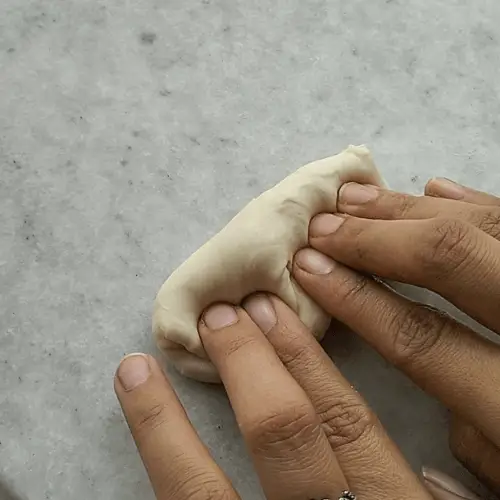
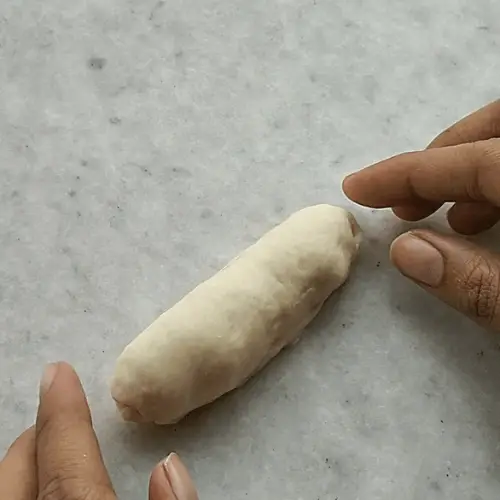
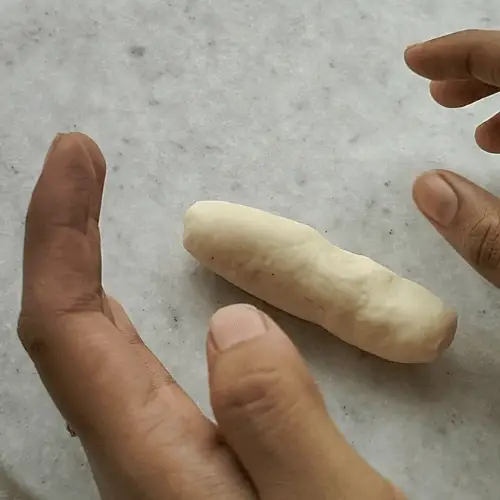
Now roll up the dough into cute little roundels, and punch the roundels down into a rectangular shape. Refer to the picture and video to shape it well. Seal the edges well. Place them on a greased baking tray. Grease using butter or oil.
I used a 22 cm round baking tray, but you can use baking trays of any shape. Just make sure it has enough space for the buns to double up in size.
Preheat the oven to 220 degrees Celsius/428 degrees Fahrenheit.
Proofing
Cover the dough with either a damp cloth or a cling film and let it proof in a warm area.
Let it rise for half an hour or till it doubles up in volume. Check for proofing by poking the bun lightly, and it should create a dent that would spring back slowly till halfway.
Baking it in the oven
Prepare a milk wash by mixing 50 ml of milk with a pinch of salt and sugar. If you have leftover eggs, you can use that too.
Gently apply milk wash using a pastry brush. This step makes the buns more golden in color.
Bake your bread at 200 degrees Celsius/392 degrees Fahrenheit for 10 minutes. Every oven is different, so check it for 8 minutes. In the oven, the proteins and sugars that are in the dough, with the combination of heat from the oven, brown. This is called the “Maillard reaction” and is what makes the buns so visually appealing.
Baking it in the air fryer
Now, if you want to make it in the air fryer, you can pre-heat the air fryer to 200 degrees Celsius/392 degrees Fahrenheit for 5 minutes and then bake it at 200 degrees Celsius/392 degrees Fahrenheit for 5 minutes. I used a plate and placed the buns on it because I did not want the texture and mark of the air fryer on the back of the hot dog buns.
After bake care
Brush it with some oil or butter immediately after taking it out of the oven. This keeps the buns soft.
Once they have cooled down, store it in an airtight container. It will stay good for up to 5 days.
To use, slice and reheat the bread on a pan or in the microwave.
Hot dog buns are ready! Make mini hot dogs or sandwiches, and enjoy!
Step-by-step pictures on Mini Hotdog Buns?


Make it with me- Video Tutorial
Frequently Asked Questions about Mini Hotdog Buns:
Can I substitute all-purpose flour with another type of flour, such as whole wheat flour or gluten-free flour?
While all-purpose flour is recommended for the fluffiest texture, you can experiment with other flour like whole wheat or gluten-free flour. However, keep in mind that the texture and taste may differ slightly. I have not done any recipe testing using this flour, so please go ahead, keeping in mind it may not turn out as expected.
Can I use instant yeast instead of active dry yeast? If so, do I need to make any adjustments to the recipe?
Yes, you can use instant yeast instead of active dry yeast. Use half the amount of instant yeast compared to the active dry yeast.
Can I replace the sugar with a sugar substitute or omit it altogether?
Sugar not only adds sweetness but also helps activate the yeast and enhance browning. If you prefer to reduce or omit sugar, the buns may not brown as nicely, and the flavor may be slightly affected.
Can I use non-dairy milk, such as almond milk or soy milk, instead of regular milk?
Absolutely! You can use non-dairy milk as a substitute for regular milk. Almond milk, soy milk, or any other non-dairy milk should work fine in the recipe.
Can I make these buns without using an egg? What can be used as an egg substitute?
If you prefer to make the buns without eggs, you can try using a suitable egg substitute such as applesauce, mashed banana, or a commercial egg replacer, following the instructions on the package.
How should the buns be stored, and for how long?
Once cooled, store the buns in an airtight container at room temperature for 2-3 days. If you want them to stay fresh longer, you can store them in the refrigerator.
Can I freeze the buns for later use?
Yes, these buns can be frozen. Make sure they are completely cooled, then place them in a freezer-safe bag or container. They should keep well for up to 2-3 months. Thaw them at room temperature or gently warm them before serving.
Can I make these buns without using any salt?
No, salt is essential in bread making and cannot be omitted.
Are these buns suitable for people with dietary restrictions, such as vegans or those with gluten intolerance?
These buns can be modified to suit certain dietary restrictions. For vegans, you can substitute non-dairy milk, use an egg substitute, and omit the egg wash. For gluten intolerance, you can try using a gluten-free flour blend.
Can I shape the buns differently, such as making them larger or into rolls, or shape the dough into different shapes, such as hamburger buns or dinner rolls, instead of hot dog buns?
Absolutely! You can shape the dough into different sizes or shapes, such as larger rolls or hamburger buns. Just adjust the baking time accordingly.
How do these buns compare to store-bought buns in terms of taste and texture?
These homemade buns tend to have a fresher taste and a softer, fluffier texture compared to store-bought buns. The extra effort is worth it!
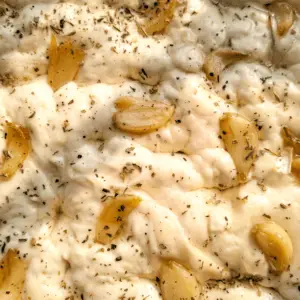
Can I add any additional ingredients, such as herbs or spices, to the dough for added flavor?
Yes, you can certainly add herbs or spices to the dough for added flavor. Popular options include:
- Garlic powder.
- Dried herbs like rosemary or thyme.
- A sprinkle of bagel seasoning.
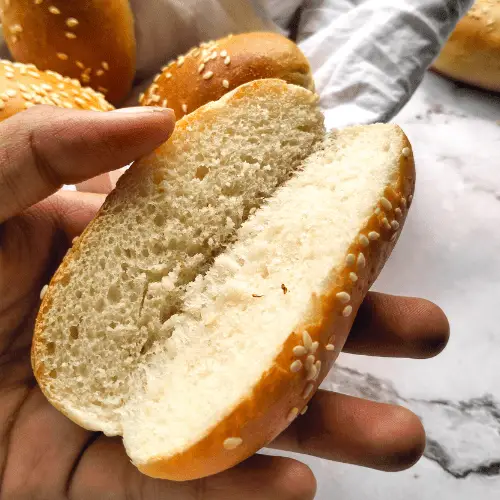
How do I achieve the fluffiest texture for the buns?
To achieve the fluffiest texture, make sure to knead the dough until it becomes smooth and elastic. Allow it to rise until doubled in size, and handle the dough gently when shaping the buns to avoid deflating the air pockets.
Can I make these buns without using milk and just using water instead?
Yes, you can make these buns using water instead of milk. However, keep in mind that milk adds tenderness owing to the fat and a slight richness to the buns, so the texture and taste may differ slightly.
Can I make these buns using a bread machine or stand mixer?
Yes, you can use a bread machine or a stand mixer with a dough hook attachment to make the dough. Follow the machine’s instructions or mix the ingredients until the dough becomes smooth and elastic.
Can I use honey or another sweetener instead of sugar?
Honey or other sweeteners can be used as a substitute for sugar. Keep in mind that honey may add a distinct flavor to the buns. Adjust the amount based on your desired level of sweetness.
Can I make these buns ahead of time and reheat them before serving?
Yes, you can make the buns ahead of time and reheat them before serving.
Other bread recipes:
[ CLICK ON THE IMAGE FOR THE RECIPE]

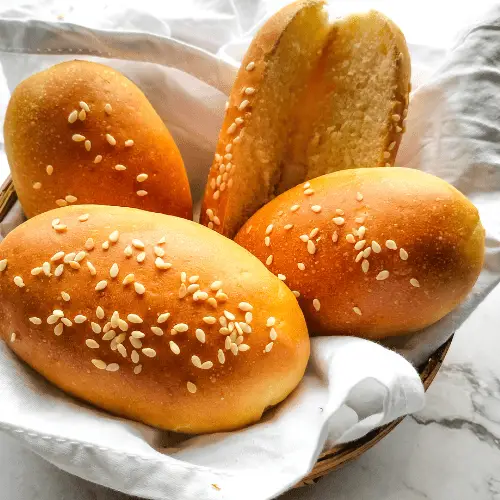
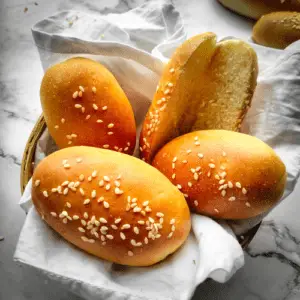
The fluffiest Mini Hotdog Buns
Mini Hotdog Buns that are super fluffy and soft will spruce up your everyday meals. Add sauce and protein and you have got yourself a winner.
Ingredients
- Flour: 150 grams
- Active Dry Yeast: 2.5 grams or 1/2 tsp
- Water: 75 ml
- Salt: 2.5 grams or 1/2 tsp
- Sugar-10 grams
- Milk: 20 ml
- Refined Oil: 10 ml
Directions
- Step 1 Begin by sieving the flour in a bowl and measuring other ingredients. Add the salt to the flour. If you are using instant yeast, skip this step.
- Step 2 If you are using active dry yeast like me, mix the yeast, milk, and sugar in another cup or bowl. Stir to mix well and dissolve the sugar. Cover and let the yeast activate for 5 to 10 minutes. Once the yeast mix is bubbly and frothy, add it to the flour mix.
- Step 3 Add the oil to it too. Knead it for 15 minutes by hand or 8 minutes by machine. Knead it to form a small smooth round ball or “boule”.
- Step 4 Brush some oil in a bowl and place the dough inside. Cover with a damp cloth or a cling film and let it be in a warm area.
- Step 5 If it is too cold where you are staying, preheat your oven for about 5 minutes at 200 degrees Celsius/392 degrees Fahrenheit, and then place the dough bowl inside. Place a cup of water to create some humidity inside too.
- Step 6 Let it rise for 30 minutes or till it doubles up in volume.
- Step 7 Punch to degas the dough, I know, satisfying!
- Step 8 Measure out 3o grams of portions of the dough. In case you don’t have a weighing scale, simply eyeball.
- Step 9 Grease the baking tray using butter or oil. Now roll up the dough and shape them into hot dog buns and place them on a greased baking tray. For shaping instructions, check step-by-step pictures.
- Step 10 I used a round baking tray for baking, you can use baking trays of any shape. Make sure it has enough space for the buns to double up.
- Step 11 Preheat the oven to 200 degrees Celsius/392 degrees Fahrenheit.
- Step 12 Cover the dough with a damp cloth or a cling film and let it rise in a warm area.
- Step 13 Let it rise for an hour. Check for proofing by poking the bun lightly, it should create a dent that would spring back slowly till halfway.
- Step 14 Prepare a milk wash by mixing 50 ml of milk with a pinch of salt and sugar. Gently apply milk wash using a pastry brush.
- Step 15 Bake your bread at 200 degrees Celsius/392 degrees Fahrenheit for 10 minutes. Every oven is different so check it at 8 minutes. Once the top is golden brown, it’s done.
- Step 16 Brush it with some oil or butter immediately after taking it out of the oven. This keeps the buns soft.
- Step 17 Mini hot dog buns are ready!

MADE THIS RECIPE?
Tag @alishasdessertsafari on Instagram and hashtag it #alishasdessertsafari
Don’t forget to Subscribe to get new recipes every week because you will love it!
Follow me on social media to get more BTS, baking tips, launches and daily updates.
I hope you found my post “The fluffiest Mini Hotdog Buns” helpful. If you have any queries, feel free to post them in the comments below.
Thank You.


How cute are these. I am definitely using them for my next BBQ.
I just love this and its was a big hit with everyone. And this was such a pleasing experience!
These hot dog buns are incredible! They make regular hot dogs almost gourmet!
I love how easy these light, fluffy and fabulous buns are to make. They truly are perfect for any meal.
This is seriously amazing! I love how fluffy it is!
I will definitely make this again! It is so good!
So glad we found your recipe! We love hot dogs, but can never find buns that compliment the flavor until these!
I am so glad you found it now, happy baking:)
Hey there! Just wanted to drop by and let you know how much I adored your post on Mini Hotdog Buns. Your recipe had me drooling from the very first glance! The way you perfectly captured the softness and fluffiness of those buns was truly impressive. The detailed instructions and helpful tips made it a breeze to recreate them in my own kitchen. And let’s not forget the mouthwatering pictures that accompanied your post—they were pure foodie heaven! Thank you for sharing this delightful recipe. Can’t wait to try it out again soon!
Tavo, you are so sweet, thank you so much for your kind words, so happy you loved it:)
I was looking for a recipe like this, thank you for sharing! I can’t wait to try it soon!
I am so glad you loved it:)