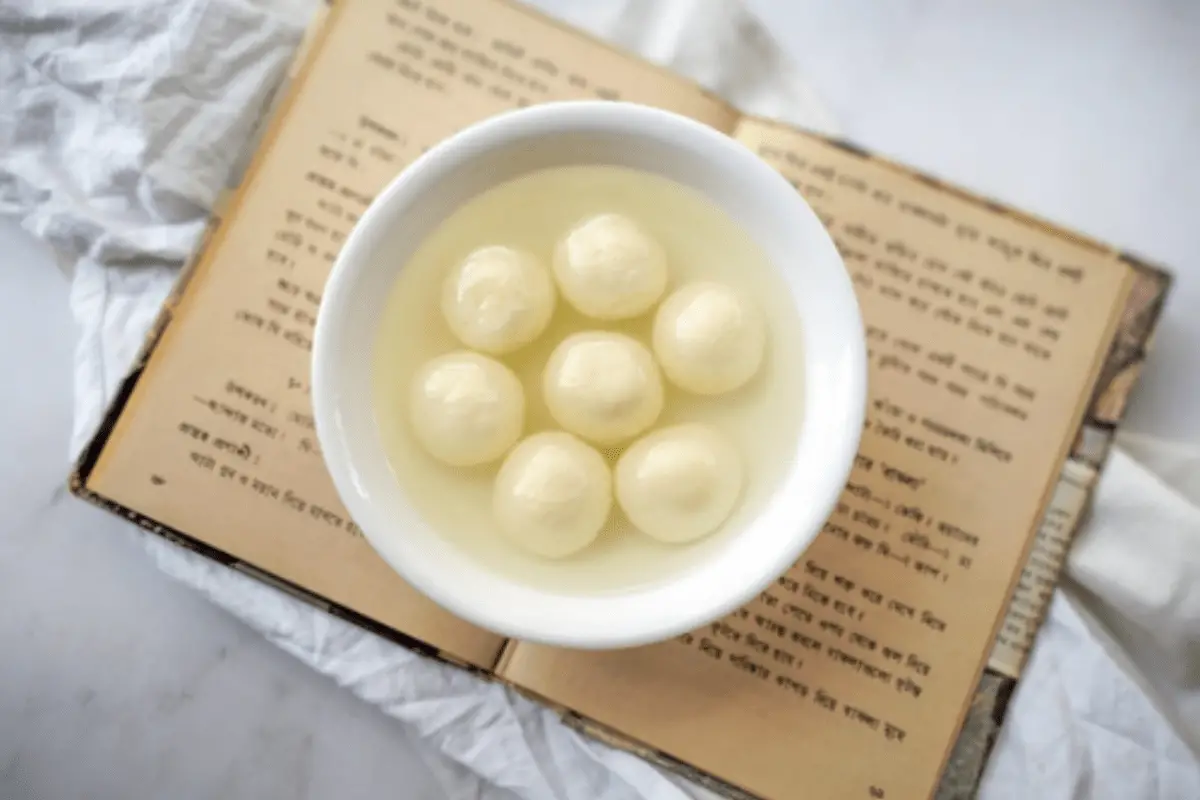
Today I am bringing to you an easy recipe for rasgulla which is one of the most popular Indian desserts loved by kids and adults alike and is sure to bring a wide smile by the name itself. This easy recipe for Rasgulla is a soft white, fluffy, and juicy syrup-filled delicacy made primarily of chenna(a variety of Indian cheese).
Rasgulla or Roshogolla as it is popularly called in different states across India is a popular sweet dish from the eastern states of West Bengal and Odisha. It is also a delicacy enjoyed in various South Asian countries. Rasgullas are typically available all through the year but are a lot in demand in Indian sweet shops and grocery stores, especially during festive occasions like Diwali and Durga Puja, and can be made with minimal ingredients much like this Kunafa with cream recipe which is another festive treat I made recently, and I am sure you will love it too.
I am a Bengali, so enjoying a few cold rasgullas after lunch and dinner was a constant in my house when I was a kid. While some of my family members loved to eat it hot, I preferred this spongy sweet treat cold. Trust me, cold or chilled rasgullas are a different experience altogether.
I distinctly remember an uncle bringing us, gur (jaggery) roshogolla which tasted yummy as well, since then we fondly called him…..”roshogolla uncle” as kids.
You definitely must have tried roshogolla on your way, either from a sweet shop or a canned version which definitely tastes okayish, but if you have not made it yet, my easy recipe for rasgulla today will show you how exactly you can make yummy rasgullas at your home and treat your family and friends to this popular Indian dessert.
Table of contents:
- Equipment required
- Ingredients required
- Procedure
- Step-by-step picture
- Video Tutorial
- FAQ
- Recommended recipes
- Recipe Card
There are links on this site that can be defined as affiliate links. As an Amazon Associate, I earn from qualifying purchases.
What equipment do I require to make this sponge rasgulla recipe?
A set of teaspoons and tablespoons: This stainless-steel measuring spoon set is perfect. I use the one that my pastry college provided me. I did use the plastic ones but let me tell you, they may look boring but stainless steel is best for long-term and safe use.
Heavy-bottomed saucepan: I have used this saucepan here, you use a saucepan or a heavy-bottomed pan here to heat your milk and also to prepare your cooking syrup and dipping syrup, so make sure you have sets of these.
Big Bowl: This big bowl keeps our dipping syrup and a separate one to rest our chenna so that the excess whey gets removed.
Colander or Strainer: You can use this or this to strain the curdled milk for our chenna.
Muslin Cloth: You will need a muslin cloth to line your strainer with, I have used Muslin cloth.
Weighing Scale: Not everything good is costly and this weighing scale is perfect for weighing for all your recipes. I have been using this one for 6 years and then it broke because well I dropped it by mistake. You would think, I bought one after that but no. I decided to use a tape and kept using it for 6 more months until it finally gave up and I had to buy another one. We will use this to measure all the ingredients required at each step to make a perfect spongy roshogolla.
Kitchen Thermometer: Optional, mainly used to check the temperature of the dipping syrup so that it turns out perfect. If you do not have one you can check the consistency in the procedure to make sure your syrup turns out perfect.
Plate: I have used a plate to knead our chenna to get that perfect smooth round balls of rasgulla.
Which ingredients do I need to make this easy recipe for rasgulla?
For the Roshogolla-
Milk:
I have used full-fat milk here to make chenna(a variety of Indian cottage cheese) from scratch, I know even you would want to make your rasgulla rich and flavorful which is why I would suggest you use nothing less than full-fat milk to get the perfect chenna. Milk is an integral part of various Indian dessert preparations so here is one milk-based sweet dish great for the ongoing festivities Bengali rice kheer recipe with jaggery.
Cornstarch:
Cornstarch is used here to bind the chenna and balance the moisture in the chenna so that you get perfect round balls that are crack-free.
Vinegar:
Vinegar is used here to curdle the milk so that we get our chenna. Vinegar is acidic and is added with water to heated milk so that the milk will curdle fast.
Water:
To make the vinegar water dilution, you will pour it into the milk.
For the cooking syrup-
Sugar and water:
We make this syrup by boiling sugar and water in the mentioned quantities and cooking our roshogollas in this syrup, they will double up in size during cooking by absorbing some of the liquid.
For the Dipping syrup-
Sugar and water:
This syrup is used to dip the cooked roshogollas so that it absorbs all the syrup inside its spongy texture and you get the perfect juicy bite with every roshogolla, this syrup also ensures that your rasgullas retain moisture and do not end up drying.
Note: You can use flavor for your dipping syrup by adding some rosewater or cardamom pods, however, I have kept my rasgullas plain as this way tastes delicious too.
Step-by-step pictures on how to make an Easy Recipe for Rasgulla:

Procedure to make Rasgullas:
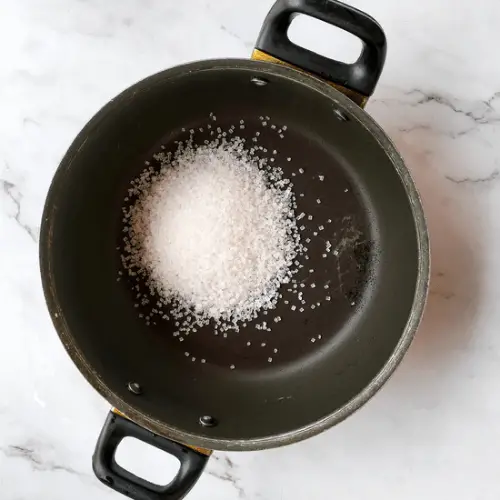
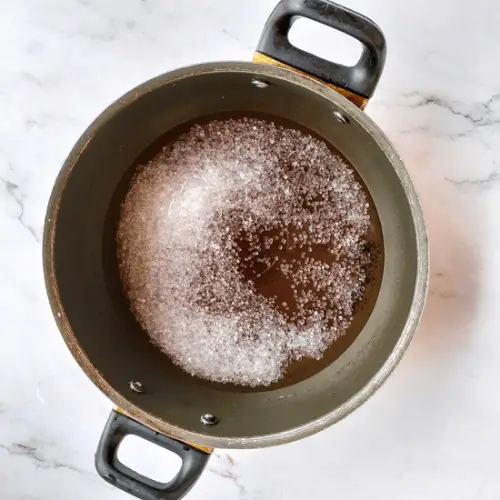
Preparing the dipping syrup
Let’s make the perfect dipping syrup! Grab a pan or kadhai and mix sugar and water. Heat them until the syrup temperature reaches 107 degrees Celsius (225 degrees Fahrenheit). No thermometer? No problem! Take a spoonful of the syrup and drop it – watch for two threads forming as it falls; that’s the double thread stage. If you’ve got those threads, your syrup is good to go! cover it up and keep it aside.
Time to prepare our chenna
You need to start here by making your chenna. Here’s the simple scoop: heat some full-fat milk in a heavy-bottom saucepan. Meanwhile, in a separate bowl, mix water and vinegar to add to the milk later.
While the milk is warming up, get a strainer ready with a muslin cloth on top, and place it in a big bowl that can handle all the curdled milk. When you start seeing little fumes while heating the milk, turn off the heat to keep it from boiling over. A handy tip here is to give the milk an occasional stir to prevent it from sticking to the saucepan.
Once the stove is off, add the water and vinegar mix to the milk and start stirring. As you stir, you’ll notice the milk curdling. Quickly strain the curdled milk and give the collected chenna in the muslin cloth a good wash. Washing it helps get rid of any remaining vinegar smell or taste, and it prevents the chenna from cooking more while cooling down, keeping that soft texture intact.
Now, let your chenna rest in a separate bowl in the muslin cloth for a few minutes with something heavy on top. This step ensures that all the extra whey is squeezed out, leaving you with perfect chenna. Do not remove a lot of whey because I did that once while experimenting on making rasgullas and my rasgullas cracked, I also made the mistake of keeping too much whey which made the chenna very sticky so it took me a couple of attempts to get this right.
Note: The whey squeezed out of your chenna is high in protein so you can store it properly and use it to knead your rotis or add it to your curries or dals or any gravies. It will increase the flavor and add nutrition as well.
Pro tip: To check if your chenna is just right, it should look dry, but when you press it with your finger, your hands should be a bit moist. That’s the foolproof way to know your chenna is spot on! And for an exciting way to use your chenna if you have made it extra, here’s a great recipe for you to try Nolen gur Sandesh Recipe.
Kneading your chenna dough
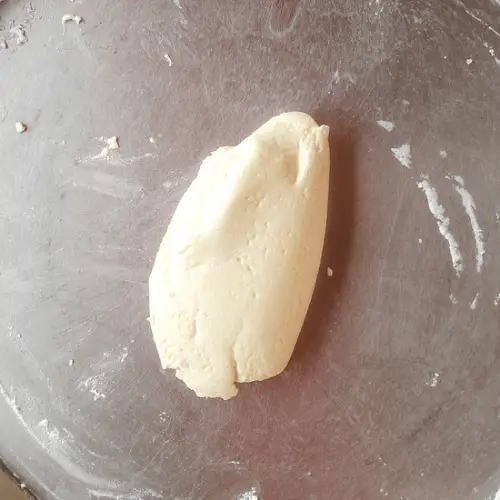
You will now need to do some handiwork here to get the perfect smooth texture to get the round balls of deliciousness! Take the chenna, transfer it to a plate and start kneading the chenna with the bottom part of your palm. Kneading is key, but no need to go overboard – just enough to get that perfectly smooth texture.
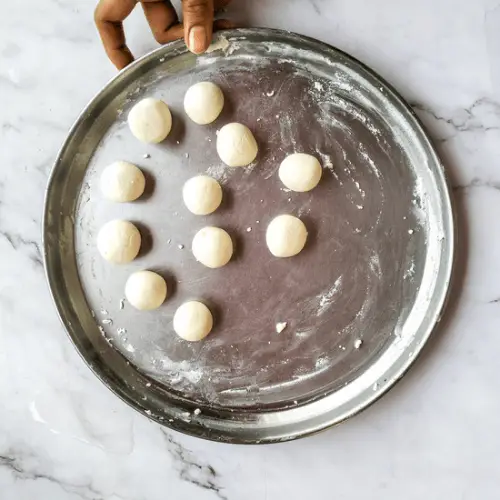
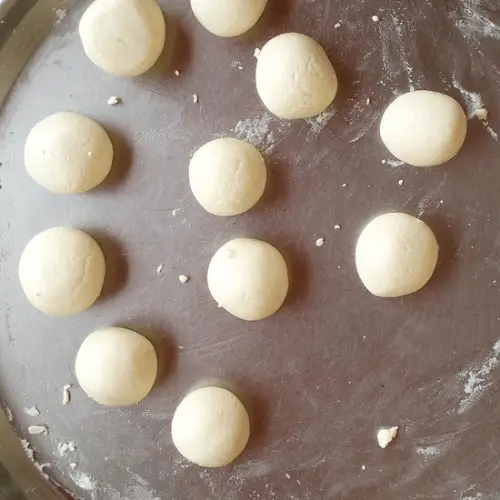
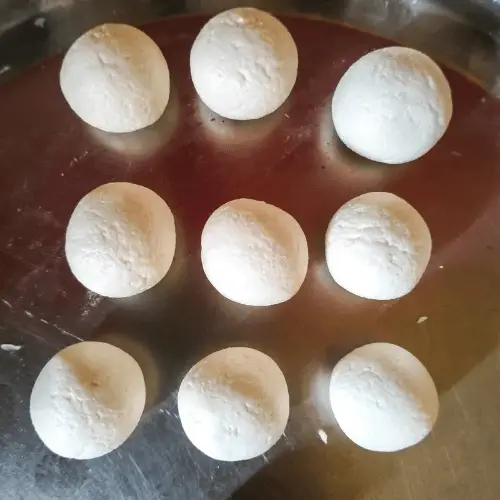
Once you have kneaded the chenna dough nicely, add the cornstarch and knead it till it is soft. Okay now that you’ve nailed that texture, it is time to shape your dough into round balls and set them aside. Easy-peasy, right?
Preparing the Cooking Syrup
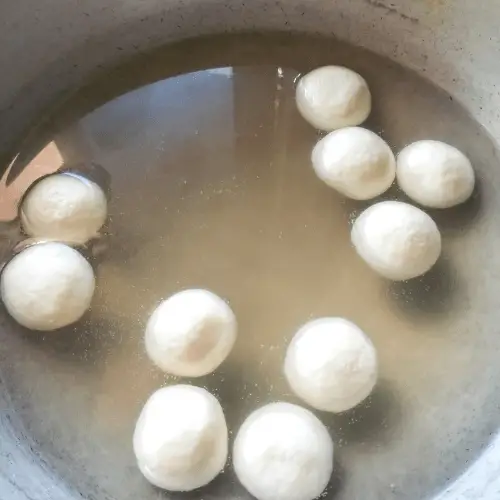
Now it’s time to cook the rasgullas so grab a heavy-bottomed wide pan or kadhai, great if you have one that can handle all the rasgullas at once. Pour in the sugar and water, and bring it to a rolling boil—look out for those continuous bubbles forming on the surface.
When that syrup is boiling, it’s showtime for our chenna balls. Drop them in when you see those continuous bubbles popping up. If your kadhai is a bit smaller, add a few rasgullas at a time, cook them up, and then start with the next batch. Don’t forget to cover the kadhai while your rasgullas are cooking.
Ideally, if your rasgullas are on the bigger side, they’ll need about 7 minutes of cooking time. My rasgullas were small in size, so they were cooked to perfection in about 4 minutes. Just make sure that water is boiling away while your roshogollas are cooking. Once done you will see that they have doubled in size. The cooking syrup here helps cook your rasgullas evenly from all sides.
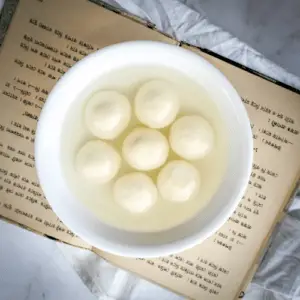
Now that all of your rasgullas are cooked, scoop them out and give them a sweet dip in that luscious dipping syrup.
And there you have it—your juicy, spongy rasgullas are ready to steal the show! Enjoy them warm or chilled, however you fancy.
With this recipe here is me wishing you a very happy Diwali and festive times with your loved ones 🎉😊
Frequently Asked Questions about making rasgulla recipe:
Note: A couple of times while I was trying to get my rasgullas right, I did end up having flatter-shaped rasgullas. It did not hold its shape since there was too much moisture, so moisture in your chenna plays a major role. I hope the procedure above helps you to make your rasgullas right from the start.
How long will my rasgullas stay fresh?
These homemade rasgullas will stay fresh for 3 days. Store them in an airtight container with the syrup in your refrigerator. Please note, that the higher the amount of moisture in your rasgulla, the higher the chances of it going bad.
What if I end up boiling the milk?
In case you end up boiling the milk, start with a fresh batch of milk because boiling denatures the protein to a level where it is not suitable for roshogolla. Denaturing of protein means protein bonds breaking up making milk fats insoluble in water. Easy right?
How long should I knead the chenna dough to achieve the right texture?
5 minutes is a good time to knead your Chenna dough.
What can I do with the whey water that is left?
You can use it to knead your roti dough, it will provide additional nutrition to your humble roti. Use it to wash your hair, protein is good for your hair and helps in strengthening your hair bonds so you can use it. Use it in your protein shakes or smoothies for a quick workout drink. You can use it in your pancake batter to provide some nutritional value. So many uses right?
What size should the rasgulla balls be for optimal cooking time?
Since the rasgullas double up in size I would suggest small or medium size would be perfect.
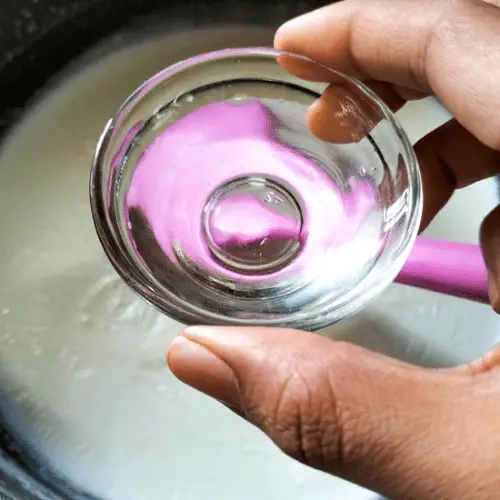
How can I tell if the rasgullas are cooked perfectly?
Drop a cooked rasgulla in a bowl of cold water, if the rasgulla goes down in the bowl that means your rasgulla is cooked, if not then cook it for a few more minutes.
Is it necessary to cover the pan while cooking rasgullas?
Covering will ensure that your rasgullas have a bit of moisture and are not dry.
What alternatives can I use for the dipping syrup in a rasgulla recipe?
You can add cardamom pods or rose water while preparing the dipping syrup.
Can I refrigerate rasgullas and enjoy them later, or are they best served fresh?
If you are a fan of cold desserts, I suggest you refrigerate them because for me rasgullas are best when chilled, however, you can enjoy them as per your preferences.
Why does the rasgulla become hard after cooling?
Very low moisture content in your chenna can lead to rubbery and dense rasgulla.
Recommended Recipes:
Here are a few crowd-pleaser recipes apt as a Diwali treat for your friends and family.
Rasmalai Cake | Eggless Tres Leches cake
Coconut Ladoo with jaggery – 3 ingredients, No Sugar
How to make Gajar ka Halwa | Carrot Halwa with condensed milk
How to make Motichoor Cheesecake
Easy Recipe for Rasgulla
Discover the perfect recipe for this famous Indian Dessert with our ‘Easy recipe for rasgulla’, simply irresistible. Try it today.
Ingredients
- For the rasgulla:
- Milk- 500 ml
- Cornstarch - 1 tsp
- Vinegar- 1 tsp
- Water- 1 tbsp
- For the cooking syrup-
- Sugar: 300 gm
- Water- 750 ml
- For the Dipping syrup-
- Sugar-200 gm
- Water-400gm
Directions
- Step 1 For the dipping syrup, grab a pan or kadhai and mix sugar and water together.
- Step 2 Heat it until the syrup temperature reaches 107 degrees Celsius (225 degrees Fahrenheit). No thermometer? No problem! Take a spoonful of the syrup and drop it – watch for two threads forming as it falls
- Step 3 that’s the double thread stage. If you’ve got those threads, your syrup is good to go! Cover it up and keep it aside.
- Step 4 For the chenna, heat up some full-fat milk in a heavy-bottom saucepan. Meanwhile, in a separate bowl, mix water and vinegar to add to the milk later.
- Step 5 While the milk is warming up, get a strainer ready with a muslin cloth on top, and place it in a big bowl that can handle all the curdled milk.
- Step 6 When you start seeing little fumes while heating the milk, turn off the heat to keep it from boiling over. A handy tip here is to occasionally stir the milk to prevent it from sticking to the saucepan.
- Step 7 Once the stove is off, add the water and vinegar mix to the milk and start stirring. As you stir, you’ll notice the milk curdling.
- Step 8 Quickly strain the curdled milk and give the collected chenna in the muslin cloth a good wash. Washing it helps get rid of any remaining vinegar smell or taste, and it prevents the chenna from cooking more while cooling down, keeping that soft texture intact. We are getting about 85 grams of chenna from 500 ml milk.
- Step 9 Now, let your chenna rest in a separate bowl in the muslin cloth for a few minutes with something heavy on top. This step ensures all the extra whey is squeezed out, leaving you with perfect chenna.
- Step 10 Do not remove a lot of whey because I did that once while experimenting on making rasgullas and my rasgullas cracked, I also made the mistake of keeping too much whey which made the chenna very sticky so it definitely took me a couple of attempts to get this right.
- Step 11 Pro tip: To check if your chenna is just right, it should look dry, but when you press it with your finger, your hands should be a bit moist. That’s the foolproof way to know your chenna is spot on!
- Step 12
- Step 13 Take the chenna, transfer it to a plate, and start kneading the chenna with the bottom part of your palm. Kneading is key, but there is no need to go overboard – just enough to get that perfectly smooth texture.
- Step 14 Once you have kneaded the chenna dough nicely, add the cornstarch and knead it till it is soft in texture. Okay now that you’ve nailed that texture, it is time to shape your dough into roundballs and set them aside. Each rasgulla before cooking weighed just 10 grams
- Step 15 To cook the rasgullas grab a heavy-bottomed wide pan or kadhai, great if you have one that can handle all the rasgullas at once. Pour in the sugar and water, and bring it to a rolling boil—look out for those continuous bubbles forming on the surface.
- Step 16 When that syrup is boiling, it’s show time for our chenna balls. Drop them in when you see those continuous bubbles popping up. If your kadhai is a bit smaller, add a few rasgullas at a time, cook them up, and then start with the next batch. Don’t forget to cover the kadhai while your rasgullas are cooking.
- Step 17 Ideally, if your rasgullas are on the bigger side, they’ll need about 7 minutes of cooking time. My rasgullas were small in size, so they were cooked to perfection in about 4 minutes.
- Step 18 Just make sure that water is boiling away while your roshogollas are cooking. Once done you will see that they have doubled in size. The cooking syrup here helps cook your rasgullas evenly from all sides.
- Step 19
- Step 20 Now that all of your rasgullas are cooked,scoop them out and give them a sweet dip in the dipping syrup.
- Step 21 And there you have it—your juicy, spongy rasgullas are ready to steal the show! Enjoy them warm or chilled, however you fancy.

MADE THIS RECIPE?
Tag @alishasdessertsafari on Instagram and hashtag it #alishasdessertsafari
Don’t forget to Subscribe to get exclusive well-curated value-packed mail twice every month that you wouldn’t want to miss out on!
Follow me on Instagram for more BTS, baking tips, launches, and daily updates.
I hope you found my post “Easy Recipe for Rasgulla” helpful. If you have any queries, feel free to post them in the comments below.
Thank You.

