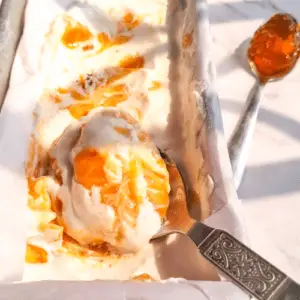
Want creamy, dreamy vanilla ice cream without an ice cream maker? This 3 ingredient no churn vanilla ice cream is your answer! Made with just three ingredients, it’s incredibly simple to whip up and irresistibly delicious. Whether you’re a dessert lover or just need an easy vanilla ice cream recipe, this one’s a keeper.
Why this recipe works:
- Quick and Simple: No churning or fancy machines needed!
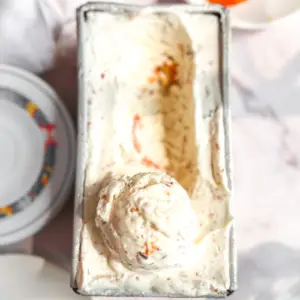
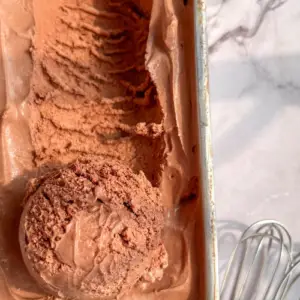
- Versatile: Use the same base to make variations like Jalebi Ice Cream, Chocolate Ice Cream, or Coffee Ice Cream. (I hate buying whipping cream and wasting the rest, why not stock up on ice creams?)
- Delicious Flavor: Vanilla pods provide a rich, authentic flavor unmatched by extracts.
Table of contents:
- Equipment required
- Ingredients required
- Procedure
- Step-by-step picture
- FAQ
- Recommended recipes
- Recipe Card
There are links on this site that can be defined as affiliate links. As an Amazon Associate, I earn from qualifying purchases.
What equipment do I need to make no churn vanilla ice cream?
- Teaspoons and Tablespoons:
For precise measurement of ingredients like salt and vanilla. Accuracy matters! - Big Bowl:
Offers enough space for whipping cream without splatters. - Spatula:
Essential for gentle folding, preventing air from escaping the whipped cream. - Weighing Scale:
Ensures accurate measurements for perfect consistency. - Cake Loaf Tin:
Ideal for freezing ice cream. However, if you have extra batter, use a larger container. - Electrical Beater:
Saves time and effort when whipping cream to soft peaks. - Balloon Whisk:
A great alternative to an electrical beater if you prefer manual tools. Its wide loops incorporate air efficiently.
What ingredients do I need to make no churn vanilla ice cream?
Whipping Cream
I used whipping cream to give it that creamy ice cream base. Whipping cream is essential as it gives your ice cream a smooth and creamy feel. It also makes the ice cream light and airy. The fat from the whipping cream ensures that the ice cream is uniform and prevents the ice crystals from becoming big, this in turn gives the ice cream a creamy smooth texture.
Condensed Milk
The second ingredient is condensed milk. Condensed milk is a thick and sweetened milk made by evaporating the water from milk. It contributes by giving this recipe sweetness and a rich creamy feel. As sugar is in a very high amount in condensed milk, it makes the ice cream firm enough to be scooped. The sugar content helps maintain the freezing point, preventing your ice cream from becoming rock-hard in the freezer.
Vanilla Pod
Brings the bold, authentic vanilla flavor. The seeds are scraped for use, and the pod itself can be repurposed for infusions. You can repurpose the pods by throwing them in sugar. You can also use them to infuse your beverages like milk, cream etc. I love using this infused cream to make myself some good ol’ hot chocolate.
Salt
I have used salt to balance out the flavors in the ice cream and bring out the unique flavors of this ice cream.
Step by Step procedure to make no churn vanilla ice cream:
Prep the Tools
Before you start, place your mixing bowl and beaters (or whisk attachment) in the refrigerator for at least 30 minutes. This step is crucial for people staying in hot climates because:
- Cold tools help stabilize the cream – Whipping cream relies on fat molecules to trap air. Warm bowls can cause the fat to soften too quickly, leading to a runny texture instead of stable peaks.
- It speeds up the whipping process – Cold cream whips faster and holds its structure better.
Alternative: If you’re short on time, pop them in the freezer for few minutes instead.
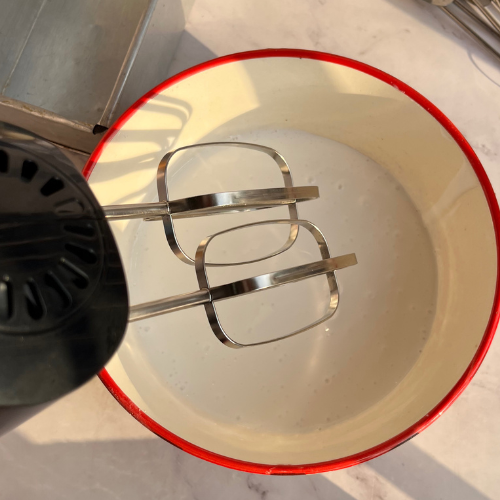
Whip the Cream
Use chilled whipping cream straight from the fridge (at least 35% fat content). Pour it into your cold mixing bowl and beat at medium speed until soft peaks form.
Why medium speed?
Whipping cream at high speed may seem tempting, but it can lead to:
Larger, unstable air bubbles that collapse quickly.
Over-whipping, results in butter instead of soft, airy cream.
How to check for soft peaks:
- Lift your whisk or beaters—if the cream forms peaks that slightly curl at the tip, it’s ready.
- If it flops over completely, whip it a little longer.
- If it holds stiff peaks, you’ve gone too far! Fold it a bit longer in case its slightly firm, or add a splash of cold cream and gently mix with a spatula to loosen it up if it’s way too firm.
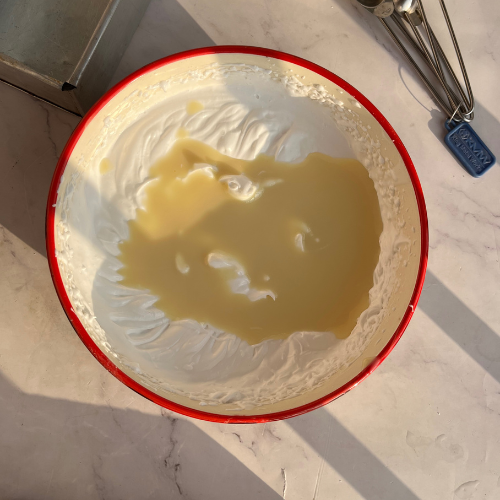
Add the Condensed Milk
Slowly pour in the sweetened condensed milk and fold it into the whipped cream using a spatula. Be gentle to keep the air trapped inside the mixture.
Why fold instead of mix?
Vigorous mixing will deflate the whipped cream, making the ice cream dense rather than light and creamy. Use a gentle “J” motion—cut through the center with your spatula, lift the mixture, and fold it over itself. Repeat until fully incorporated.
Scrape the Vanilla Pod
A real vanilla bean pod gives this ice cream a deep, complex flavor that bottled vanilla extract can’t match.
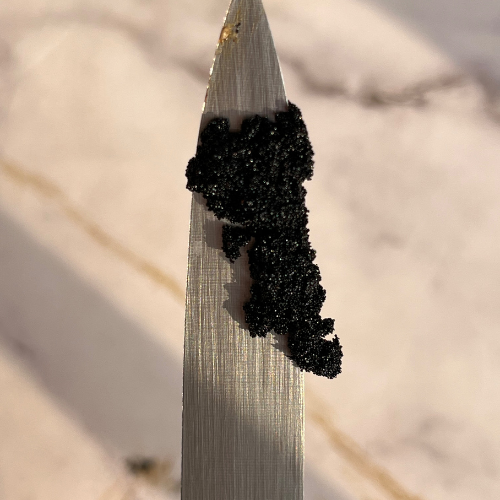
How to scrape a vanilla bean:
- Place the vanilla pod on a cutting board.
- Slice it lengthwise using a small, sharp knife.
- Gently pull apart the pod and use the knife’s back edge (not the sharp side) to scrape out the tiny black seeds.
Mix the vanilla seeds into the whipped cream mixture for that classic speckled look and rich aroma.
What to do with the empty pod?
Don’t throw it away! The leftover pod still contains flavor:
- Infuse it in sugar for homemade vanilla sugar.
- Steep it in warm milk for custards, Crème Anglaise, or pastry creams.
- Blend it into your coffee or tea for a subtle vanilla boost. You can totally pair it with this incredibly aromatic cardamom streusel coffee cake.
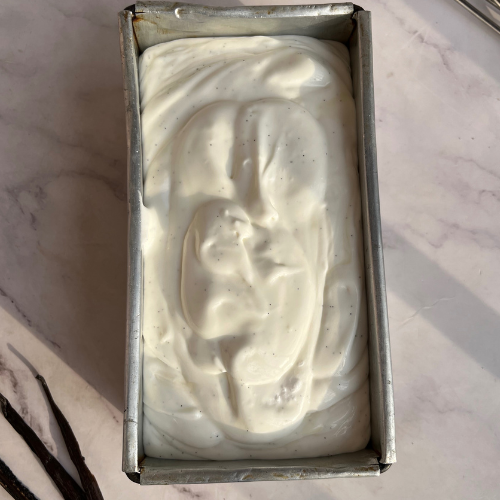
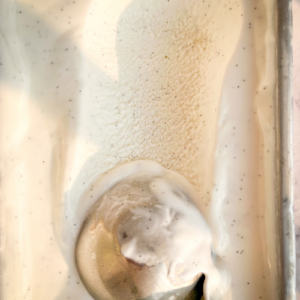
Freeze the Ice Cream
Prepping the container:
- Line a loaf tin with parchment paper. This makes it easier to lift the ice cream out for slicing.
- Alternatively, use an airtight container to prevent ice crystals from forming.
Pour and freeze:
- Smooth the mixture into the tin and cover it with plastic wrap (pressing it directly onto the surface to prevent ice formation).
- Freeze for at least 12 hours to allow the flavors to meld and the texture to firm up.
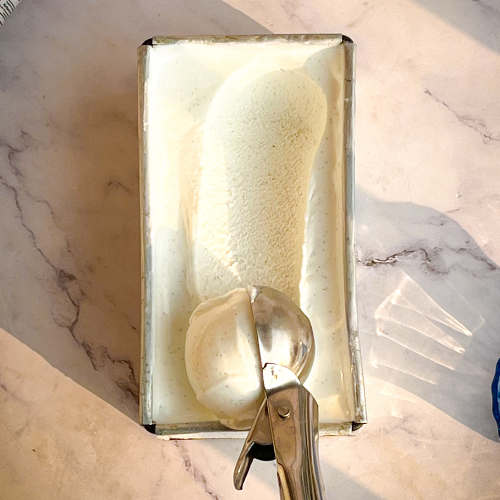
Pro Tip for Scooping:
Dipping your ice cream scoop in hot water before serving ensures smooth, effortless scoops.
Why does this work?
A warm scoop melts the surface of the ice cream slightly, making it glide through easily instead of digging and breaking the ice cream into chunks.
How to do it:
- Fill a cup with hot water.
- Dip the metal scoop in the water for 5 seconds.
- Shake off excess water and scoop immediately.
Bonus Tip: If your ice cream is too hard straight out of the freezer, let it sit at room temperature for 5–7 minutes before scooping.
Step-by-step pictures on how to make no churn vanilla ice cream:


Frequently Asked Questions about no churn vanilla ice cream:
- What does no-churn mean?
No-churn refers to making ice cream without an ice cream machine. - Can I use vanilla extract instead of pods?
Yes, but the flavor won’t be as rich or authentic. - How long does it take to freeze?
Freeze for at least 12 hours for the best texture. - What if I don’t have a loaf tin?
Use any freezer-safe container with a lid. - Why is my cream not whipping?
Ensure your cream, bowl, and beaters are cold. Avoid high speeds while whipping. - Can I make this dairy-free?
Substitute whipping cream and condensed milk with coconut cream and condensed coconut milk. Of course the taste and texture will vary significatly. - How can I store leftover ice cream?
Store in an airtight container in the freezer for up to a week. - What else can I do with vanilla pods?
Infuse them in milk, hot chocolate, or Iced Coffee. You can even flavor sugar with them. - How do I avoid ice crystals?
Cover the tin tightly and avoid frequent opening of the freezer. - Can I add toppings?
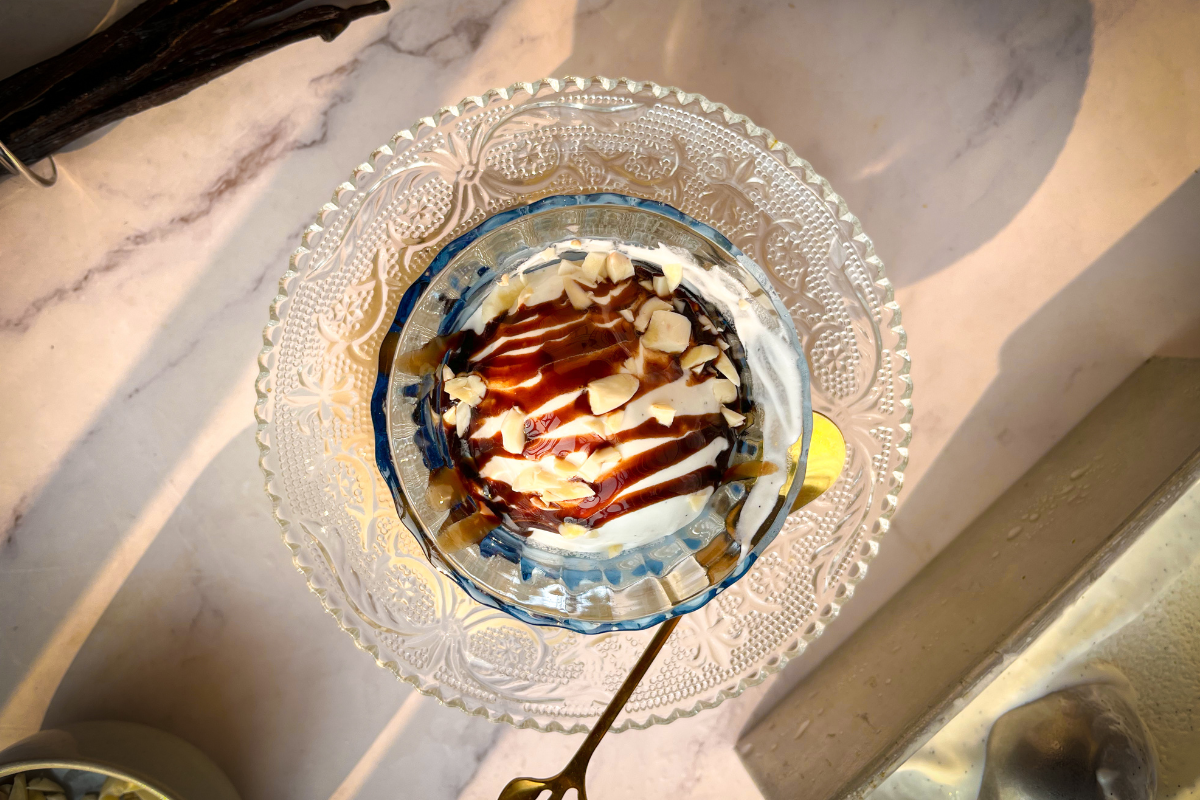
Absolutely! Let me tell you I have had vanilla ice cream with all of them and they were all heavenly, but nothing can beat warm brownies with ice cream combo. You have got to try my fudgy brownies with ice cream (aka personal fav), peanut butter brownies with ice cream, my incredibly oozy warm lava cake with this ice cream, and of course don’t we all love to accidentally drop ice creams in our hot chocolate!
More Ice Creams? 😉:

3 ingredient No churn Vanilla Ice Cream
Try this easy no-churn vanilla ice cream recipe made with 3 ingredients. Perfect for quick, creamy, homemade ice cream without a machine!
Ingredients
- Whipping cream: 200 grams
- Condensed milk: 200 ml
- Salt: A pinch
- Vanilla pods: 1–2
Directions
- Step 1 Whip the whipping cream to soft peaks, ensuring the bowl and beater are chilled for half an hour beforehand.
- Step 2 Store whipping cream in the freezer and thaw it in the refrigerator before use for best results.
- Step 3 Keep the beater at medium speed while whipping to avoid creating large, unstable air bubbles.
- Step 4 Add the condensed milk to the whipped cream and fold gently using a spatula.
- Step 5 Slice the vanilla pods lengthwise and scrape out the seeds using the back of a knife.
- Step 6 Add the seeds to the mixture, and reserve the pod for other uses like flavoring sugar or drinks.
- Step 7 Line a loaf tin with parchment paper and pour the mixture into it.
- Step 8 Cover and freeze for 12 hours.
- Step 9 Dip an ice cream scoop in a glass of hot water before scooping and serving.
- Step 10 Enjoy your creamy, no-churn vanilla ice cream!

MADE THIS RECIPE?
Tag @alishasdessertsafari on Instagram and hashtag it #alishasdessertsafari
This no-churn vanilla ice cream is creamy, flavorful, and so easy to make! With just three ingredients and no special equipment required, it’s a must-try for dessert lovers. Plus, the recipe is flexible for endless customizations. Go ahead and treat yourself!
Don’t forget to Subscribe to get a value-packed newsletter every month.
I hope you found my “3 ingredients no churn vanilla ice cream” helpful post. If you have any queries, feel free to post them in the comments below.
Thank You.

